
A Lighting Plan Is the Cheapest Upgrade in Any Remodel
Three layers, the spacing numbers that prevent shadowed counters, color temperature, dimmer compatibility, and what layering a room costs.
Two identical rooms, same paint, same floor, same furniture. One feels calm and expensive, the other feels like a dentist’s waiting area. Nine times out of ten the difference is lighting, and it is the last thing anyone budgets for.
“Why does my newly renovated room still feel flat?”
Because it has one layer of light instead of three, and every bulb in it is the same color temperature. At ADS Building & Remodeling we wire rooms in homes across Buffalo Grove, Arlington Heights, Glen Ellyn, Naperville, Wheaton, and Schaumburg, and lighting is consistently the cheapest upgrade with the largest emotional payoff.
The Three Layers
Ambient is the general fill: recessed cans, a flush mount, a ceiling fixture. It lets you cross the room without hitting furniture. On its own it flattens everything.
Task is light aimed at work: under-cabinet strips over a counter, a pendant over an island, a reading sconce beside a bed, a vanity light at face height.
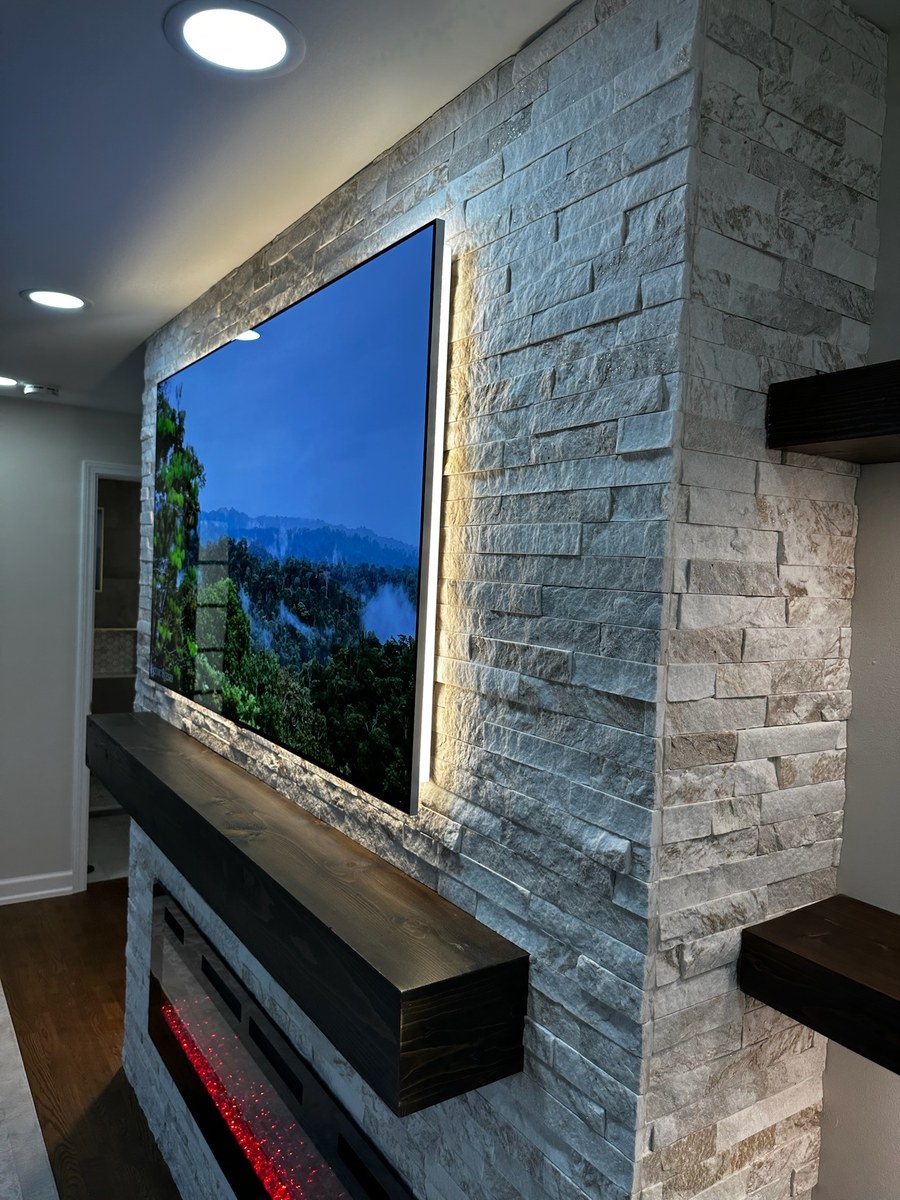
Accent is the layer that makes a room look designed: light on artwork, inside a glass cabinet, along a stair, under a floating vanity, washing a stone fireplace wall.
A room with all three, on separate switches, can be four different rooms depending on the hour. A room with only ambient is always the same room.
Numbers That Prevent the Common Mistakes
- Recessed can spacing: roughly half the ceiling height apart. An 8 foot ceiling wants cans about 4 feet apart, not scattered at 6 to save two fixtures.
- Cans near walls: 24 to 30 inches off the wall, so light washes the wall instead of pooling in the middle of the floor.
- Over counters: place cans over the front edge of the counter, so your body does not shadow the work surface.
- Island pendants: bottom of the fixture 30 to 36 inches above the counter, spaced evenly with the outer pendants inset from the island ends.
- Vanity lighting: sconces at roughly 60 to 66 inches, flanking the mirror. A single bar above the mirror lights the top of your head and casts every wrinkle downward.
- Dining fixture: 30 to 34 inches above the table, and about two thirds the table width.
Color Temperature: The Free Decision Nobody Makes
Bulb color is measured in Kelvin. In homes:
- 2700K is warm, close to old incandescent. Living rooms, bedrooms, dining rooms.
- 3000K is slightly cleaner and crisper. Kitchens, bathrooms, laundry, basements.
- 4000K and above is commercial. Garages and workshops, not living space.
Pick one temperature per sight line and stay with it. A kitchen where the cans are 3000K, the under-cabinet strips are 4000K, and the pendants are 2700K reads as sloppy even to people who could not tell you why.
The second number worth knowing is CRI, which measures how accurately a light renders color. Anything under 90 makes wood, skin, and paint look slightly wrong. Fixtures with CRI 90+ cost a few dollars more and are the difference between a kitchen that photographs well and one that does not.
Dimmers Are Not Optional
Every ambient circuit in a living space should be dimmable, and the dimmer has to match the driver in the fixture or you get flicker and buzz. This is the most common lighting complaint we get asked to fix in homes finished by someone else, and it is entirely a compatibility problem, not a fixture problem.
One practical rule: buy fixtures and dimmers as a set, from lines known to work together, and have the electrician test one before all twenty are installed.
Room by Room, What Actually Matters
Kitchen. Under-cabinet lighting on every working run. It is the single highest-value lighting dollar in the house. Pendants on their own switch. Cans over counters, not over aisles.
Bathroom. Light at face height, ideally from both sides. A separate, very dim path light or a toe-kick strip so nobody has to turn on the full array at 3 in the morning. Exhaust and light on separate switches, always.
Basement. Low ceilings mean the fixture depth matters. Shallow canless LEDs let you keep headroom. Add accent light on any built-in or bar, because a basement lit only by a ceiling grid always looks like a basement.
Stairs and hallways. Wall sconces or step lights, and three-way switching at both ends. A hallway lit by a single fixture in the middle is where a home starts feeling institutional.
Living room. Fewer cans than you think, plus lamps on switched outlets. Then one accent: a picture light, a fireplace wash, or a cabinet interior. That third layer is what makes the room feel finished.
Smart Controls, Used Sparingly
Our advice after years of installing these: put smart control on scenes people actually use, and leave everything else on a normal switch. Kitchen evening scene, exterior lights on a schedule, and maybe a whole-floor off button at the primary bedroom. Wiring an entire house to an app makes every guest and every babysitter helpless, and it becomes an inconvenience the day the hub stops being supported.
What It Costs
Layering a single room during a remodel: $800 to $3,000 including fixtures, cans, dimmers, and labor, depending on how much of the ceiling is open.
Under-cabinet lighting for a full kitchen: $600 to $1,600 installed with proper drivers and dimming.
Adding recessed lighting to a finished room, ceiling closed: $150 to $350 per fixture, plus patching and paint.
Which is why lighting is planned while walls are open. Doing it later costs two or three times as much and involves drywall repair in a room you just finished.
Common Questions
How many recessed lights does a room need?
Fewer than most plans show, once task and accent layers exist. A 12 by 15 living room with lamps and one accent might want four cans. The same room lit only by cans needs eight and still feels flat.
Are LED strips reliable now?
Good ones are. Buy quality strip with a matched power supply, use aluminum channel with a diffuser so you see light rather than dots, and keep drivers accessible for service.
Can lighting be changed after the remodel?
Fixtures, yes. Locations, dimmers, and switch layout are a wiring conversation, which is why we draw a lighting plan before drywall on every project.
Important Note
Ranges here are planning guides, not quotes, and they assume work done as part of an active project. At ADS the in-home consultation, the lighting plan, and the 3D rendering are complimentary.
Planning a Room This Year?
If you are remodeling in Buffalo Grove, Arlington Heights, Glen Ellyn, Naperville, or a nearby Chicago suburb, ask to see a lighting plan before drywall goes on. It is a drawing that takes an hour and changes how the room feels for as long as you own it.
At ADS Building & Remodeling, we provide:
- A complimentary design consultation and 3D rendering
- A lighting and switching plan drawn before rough electrical
- A fixed-price quote that doesn’t move after you sign
- One accountable team, permits, inspections, and project management from demo to final walk-through
Nobody walks into a room and compliments the lighting. They just decide the room feels good, and they are almost never right about why.